Drip Cake Tips! My Way!

Hey Lovelies I hope your week has been awesome?! If not, I hope it get's better!
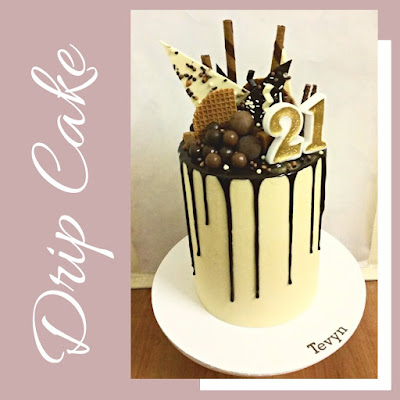
Today I just wanted to share with you a few of my chocolate drip cakes and a couple of tips that work for me.
Drip cakes are so easy and take some of the stress out of wanting a "perfectly" smooth top. (Yes I have issues!) It really doesn't matter that your top is a little rough because you're going to cover it with yummy chocolate ganache and then decorate it with anything you like!
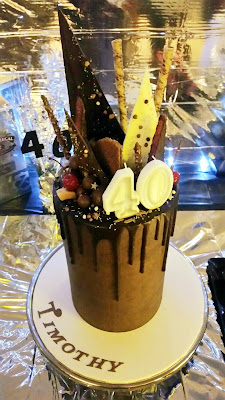
Now, it is most common for drip cakes to be buttercream with the chocolate drip on top but you know me, I am a ganache girl! So all mine are covered in chocolate ganache. I prefer the taste, texture and the durability of a ganache base, and for me, living in a tropical climate I find buttercream melts way too fast!
However which ever one you use to cover your cake these tips will work for both buttercream and ganache.
Scroll down for the list.
 |
| 40th Birthday Drip Cake |
Drip Cake Tips
1. You must use a 2:1 ganache ratio or your drip will either be too runny or set too fast and be lumpy. 2:1 means 2 parts chocolate, 1 part cream. E.g. 200grams chocolate plus 100ml cream.
2. Your cake base must be cold. Whether you covered it in ganache or buttercream, it needs to have been in the fridge for at least an hour. If it is not cold enough you will run into problems like the base melting or the drip not setting fast enough and you get puddles on your cake board.
3. Use plastic cling wrap to cover your board. You want your cake set up on it's final board before doing the drips otherwise it becomes really tricky trying to move it later. To protect your nice board cover it in the plastic wrap as pictured.
 |
| Protect your cake board. |
4. There are different techniques to apply the drip, I have seen people use piping bags, sauce bottles and simply pouring on. I don't find those easy for me! So I use a spoon and place a little at a time on the edge of the cake. This allows me to control the look. I am not a fan of too much dripping to the bottom. With the spoon method I can adjust the quantity and therefore the length of each drip. Once your drips are done you can just spoon some in the middle to fill it. Again it doesn't really matter how smooth the top centre is if you're going to cover it with decorations.
5. Keep you dripping ganache warm (not hot) while you are working. I like to use the double bowl method. I place some hot (not boiling) water in a larger bowl and sit the ganache bowl inside. You want your ganache to always be a pouring consistency while you work.
Working out the best consistency can be tricky depending on your room temperature but if you follow these tips you should be able to make it work in any kitchen.
Once you are done pop the cake back in the fridge for 10- 15 mins to let the drip set. Then you are ready to decorate.
Happy caking!
Share ♥ Inspire ♥ Motivate ♥
Home Bakers Doing it For Themselves


Great tips! I will have to try these tips next time.
ReplyDelete